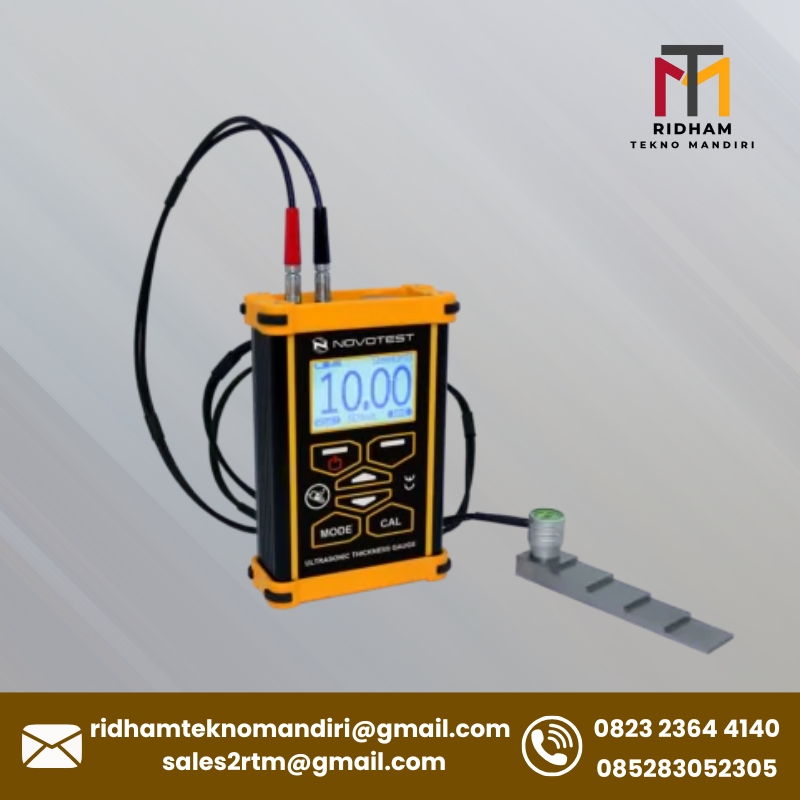
Spesifikasi
Probe type range for steel, mm:
Probe 10MHz – P112-10-2×3: 0.4–15
Probe 10MHz – P112-10-6 / 2: 0.45–300
Probe 5MHz – P112-5-10 / 2: 0.8–500
Probe 2,5MHz – P112-2,5-12 / 2: 2.5–1000
Probe 2MHz – P112-2-20 / 2: 3–1200
Probe 1,25MHz – P112-1.25-20 / 2: 4–1500
Probe dimensions, mm:
Probe 10MHz – P112-10-2×3: 4×9×60
Probe 10MHz – P112-10-6 / 2: D12×15
Probe 5MHz – P112-5-10 / 2: D17×20
Probe 2,5MHz – P112-2,5-12 / 2: D20×21
Probe 2MHz – P112-2-20 / 2: D30×28
Probe 1,25MHz – P112-1.25-20 / 2: D30×35
Dimensions of probe contact area/crystal, mm:
Probe 10MHz – P112-10-2×3: 2×7 / 2×3
Probe 10MHz – P112-10-6 / 2: D9 / D6
Probe 5MHz – P112-5-10 / 2: D14 / D10
Probe 2,5MHz – P112-2,5-12 / 2: D16 / D12
Probe 2MHz – P112-2-20 / 2: D24 / D20
Probe 1,25MHz – P112-1.25-20 / 2: D24 / D20
Optional probes:
5MHz high-temperature probe (echo) 10/2: range 0.8–300 mm, surface temperature up to 250 °С / 482 °F
2,5MHz probe (echo-echo) 12/2 for through coating: range 6–30 mm, coating thickness range – up to 1 mm
5MHz probe (echo-echo) 10/2 for through coating: range 3.5–26 mm, coating thickness range – up to 1 mm
10MHz probe (echo-echo) 6/2 for through coating: range 2–12 mm, coating thickness range – up to 0.6 mm
5MHz probe (echo-echo) 10/2 for through coating, underwater, 10 m cable: range 3.5–26 mm, coating thickness range – up to 1 mm
5MHz probe (echo-echo) 10/2 for through coating, underwater, 20 m cable: range 3.5–26 mm, coating thickness range – up to 1 mm
5MHz probe (echo-echo) 10/2 for through coating, underwater, 30 m cable: range 3.5–26 mm, coating thickness range – up to 1 mm
Compatible probe types:
Ultrasonic, dual-element, longitudinal waves (including probes of other manufacturers)
Compatibility with Active EMAT Transducer EMAT-A1:
No
Probe calibrations (V-path, TVG, etc.):
Factory for NOVOTEST probes
Users for probes of other manufacturers
Probe cable connector type:
2 Lemo 00
Probe cable length, m:
1.2
Measurement scales:
mm (m/s)
inch (inch/μs)
Measurement resolution, mm/inch:
0.01 / 0.001 (0.01 / 0.0001 by request)
Basic measurement accuracy, mm:
± (0.01 T + 0.05) (*For range 0.8–300 mm)
Gain range, dB:
± 20
Response time, with no more than, s:
1
Setting range of the ultrasonic velocity, m/s:
1000–17000
Preset velocities for materials:
Steel (8 different grades), Aluminum, Iron, Cast Iron, Zinc, Chromium, Copper, Brass, Bronze, Silver, Gold, Nickel, Tungsten, Tin, Lead, Molybdenum, Manganese, Magnesium, Rubber, Polystyrene, Plexiglas, Capron, Caprolon, ED-5, Ebonite, Porcelain, Teflon, Textolite, Silicate Glass, Acrylic glass, User
Operating modes:
Normal
B-scan
Control mode
Standards:
ASTM E797
EN 14127
EN 15317
Body type / Dust and moisture protection level:
Plastic, with shockproof silicone case
Standard for shop and field operation
IP54
Calibration thickness block on the body:
6 mm (Steel / ~6080 m/s)
PC cable connection:
Online – NOVOTEST.INFO/USB-connect
Offline – NOVOTEST USB-Connect
Wireless connection with Android gadgets via NOVOTEST Lab App:
No
Storage capacity of measurement results:
128
Measurement archives:
Device menu
PDF
Excel (CSV)
Menu languages:
English, Spanish, Ukrainian, Russian (other languages optional)
Operating environment:
Temperature: -20°C ~ 50°C
Humidity: 30% ~ 80% R.H.
Power supply:
DC 3V (2 pcs standard batteries AA)
Time of continuous work hours, not less, h:
25
Charging:
External charger for 2 pcs AA batteries
Weight of electronic unit with batteries, no more, kg:
0.25
Overall dimensions, mm:
130 × 90 × 40
Package weight, kg:
1.5
Package dimensions, cm:
33 × 27 × 10
Documents:
Operation manual UT-1M
Quick guide UT-1M / -ST
Brochure UT-1M / -2A
Country of origin:
Made in Ukraine (Europe)
Warranty:
Basic:
– 12 months for electronic unit
– 6 months for probes
Extended (optional):
– up to 3 years

